Recipe Remix

recipe remix: chicken chilaquiles verdes

Image

Have you ever tried chilaquiles?  Chilaquiles (chee-lah-KEE-lays) is a Mexican dish that is very similar to nachos, and nachos were requested for Recipe Remix by Autumn Cole, so here we are!

The base for chilaquiles is tortilla chips, just like nachos.  Instead of being doused in queso dip (which we all know is delicious), chilaquiles features chips simmered in a rojo or verde sauce.  If you order chilaquiles from a restaurant, you have no idea of what’s in the sauce.  If you make the sauce yourself, you can control the sauce and make sure you have a delicious, plant-based sauce for your enjoyment.  Chilaquiles allows the chips to simmer for a short time in the sauce rather than being drenched with cheese which cuts down on the negative nutrition and pumps up the positive stuff.  It’s also very easy to make, and you too can create your own chilaquiles for a simple weeknight supper without any of the overindulgence.

Nutrition info: 11 Weight Watchers Points Plus, or about 550 calories.  Compare that to double or triple what you’d get with nachos!  Another tip: since you’re controlling how many chips you prepare, you won’t mindlessly eat past the serving size.  You’re welcome. 🙂

Chicken Chilaquiles Verdes

Serves 2

1/2 lb. chicken breast, cut into chunks

30 thick, yellow corn tortilla chips (don’t get the thin style, they’ll disintegrate)

8 tomatillos, husks removed

2 poblano peppers

1 jalapeno pepper

4 garlic cloves

1 cup fresh cilantro, plus some for garnish

2 limes, juice and zest

1 oz. cotija cheese or queso fresco, crumbled

salt and pepper to taste

Bring two medium pots of water to a boil.  In one, add a dash of salt and the chicken and cook for about 30 minutes.  In the other, add the tomatillos and cook for about 5 minutes.  While the tomatillos are cooking, either roast the poblanos in the oven or char them over a gas range.  Remove the charred skin with a paper towel, then cut off the stems and remove the inner seeds.

For the sauce, add the tomatillos, poblanos, jalapeno, lime juice and zest, garlic, and cilantro to a food processor or a blender and process until smooth.  When the chicken is ready, remove it from the water, shred it with your hands or two forks, and add it to the sauce.  Pour the sauce into a medium pan and stir to combine, then gently add the tortilla chips and stir.  Heat the pan over medium heat and allow the dish to bubble just a bit (about 5 minutes).  Turn off the heat and top with the cotija or queso fresco and any remaining cilantro.  Divvy the pan up between two people and serve with a simple green salad.  Enjoy!

Image

recipe remix: guiltless beef stroganoff

Image

Welcome to the third of five recipe remixes for early summer!  This is three nights in a row of recipe remixes, and I’ll pick back up with numbers four and five next week.  Alex and I are headed to the beach for a long weekend, so the challenge will conclude next week.

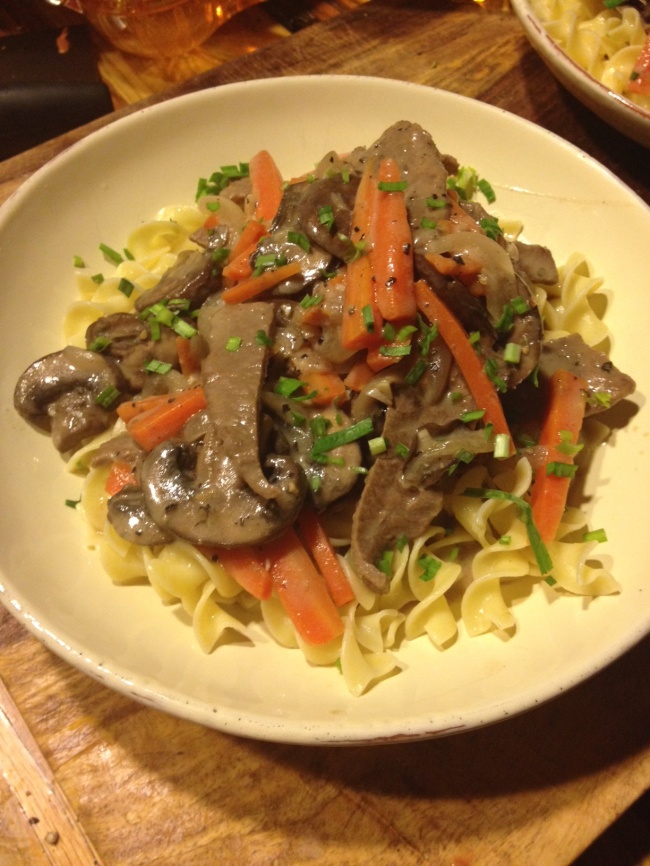
Many thanks to Lyn Harris, Laura Peacock, and Claire Steinbeck for the push to find a guiltless version of beef stroganoff!  I will be the first to admit that I’m actually not a huge fan of the original recipe.  Stroganoff is one of those dishes that is, by nature, a leftovers recipe.  Have leftover pot roast?  You make stroganoff, right?  Well, if you have a hankering for stroganoff but don’t have leftovers to transform, I have a tasty, healthy, and economical meal for you!

Here are a few of my lightened up highlights: I used thinly sliced sirloin for the meat.  I’m only cooking for two people, so I got 1/2 lb. thinly sliced sirloin for $4 at Kroger–pretty affordable!  I cut out a good bit of butter, but retained some for flavor.  I also used Greek yogurt instead of sour cream or heavy cream and cut out some of the flour.  I used extra mushrooms for volume and also added some thinly sliced carrots for color, fiber, and bulk.  Since I cut out a good bit of fat, I made sure to use flavor enhancers like cracked black pepper and chives on top to brighten up the dish.  I also carefully portioned out the buttered egg noodles to make sure that the dish was filling, but also didn’t get carried away with carbs.

Nutritional breakdown: 15 Weight Watchers Points Plus, or about 700 calories.  This includes everything–sauce and noodles.

I paired this dish with a light green salad with some blueberries from our CSA and a lemon vinaigrette.

Guiltless Beef Stroganoff

Serves 2, but recipe can be multiplied for a larger crowd

1/2 lb. thinly sliced lean sirloin

2 Tbsp. butter, separated

1/2 sweet onion, thinly sliced

2 carrots, thinly sliced

8 oz. sliced white or baby bella mushrooms

3 cloves garlic, minced

1/4 cup good white wine

2/3 cup chicken broth

2 tsp. Worcestershire sauce

1 Tbsp. flour

1 bay leaf

1/4 cup 0% Greek yogurt

4 oz. egg noodles

salt and pepper

1 Tbsp. chopped chives (or parsley, rosemary, or any fresh herb of your choice)

Prepare noodles according to package directions.  After draining, add 1 Tbsp. butter to the noodles and stir to melt.  Sprinkle with 1/4 tsp. salt and set aside.

In a large skillet, melt 1 Tbsp. butter over medium-high heat.  While butter is melting, salt and pepper both sides of the sirloin slices, then place pieces in a pan in a single layer.  Let each side brown for about 3 minutes, then remove from the pan and set aside.

Add the onions to the remaining butter in the pan, stir, and let cook for about 8 minutes.  Next, add the garlic, mushrooms, and carrots and let cook for about 8 more minutes.  Next, add the wine and, using a spoon, scrape up any browned bits from the bottom of the pan. Let the wine cook for about 3 minutes.  While this is happening, whisk together the chicken broth, Worcestershire, and flour.  Add this mixture to the pan and let cook and thicken for about 3 minutes.  Next, turn off the heat and add in the Greek yogurt, stirring to fully combine.  In two bowls, evenly distribute the buttered noodles, then evenly ladle the stroganoff sauce over the noodles.  Top with chopped chives or other herbs and serve hot.

Image


recipe remix: slimmed down chicken pot pies

Image

Thanks to friend Jessica Northenor, colleague Jennifer Blackwell, and my mother Donna Andrews, I now have a slimmed down version of chicken pot pie–and you do, too!

The #2 recipe remix is chicken pot pie, and I hope that it will be one of your new favorites.  My first thought with this dish was dread–what is chicken pot pie without the buttery, flaky crust?  I couldn’t possibly imagine a version without it, so I decided to cheat a little bit–by putting it only on the top and not lining the ramekin with it, I could still include my favorite part without totally wrecking a healthy eating plan.  I also cut out some of the richness in the filling by using 1% milk and less flour.

Typically, chicken pot pie includes the following staple veggies: onion, carrot, celery, green beans, and peas.  I used my CSA box as a guide and included the following in my recipe: onion, carrot, peas, kale, potatoes, and parsnips.  The addition of kale helped to round out this dish’s nutritional value, and let’s be honest: I love any excuse to include kale in a dish.  Don’t even get me started on this super food: loads of vitamin K, folic acid, fiber, and we know that any dark leafy green is a nutritional green light.

Let’s get started, shall we?  First, you make the soup base:

Image

Next, you cut out the puff pastry for the tops.  According the the Pepperidge Farm package, 1/6 of a sheet is one serving, so I cut each out like so:

Image

Next, I rolled them out to cover the lids of the ramekins I bought today at Robinson HomeRobinson Home is a fantastic kitchen store in downtown Macon, so if you live here, you should go there…like yesterday.  If you don’t live here, you should check out their website to order all things wonderful for your kitchen.  Next, I covered the soup-filled ramekins with the puff pastry and gave them a quick egg wash, then placed them in the oven at 400 degrees until they were golden brown.

Image

I coupled the pot pies with a simple green salad with beautiful watermelon radishes from our CSA.  They add the perfect pop of color to any salad, and just enough of a spice and crunch to compliment softer greens.

Nutritional breakdown: 13 Weight Watchers Points Plus, which roughly translates to about 650 calories.  Most pot pies are double this (1300+) because of more pastry and more full-fat dairy in the base.

Slimmed Down Chicken Pot Pies

Serves 8

5 bone in , skin on chicken thighs

6 garlic cloves

1/2 cup water

1/4 cup all purpose flour

1 1/2 cups chicken broth

4 cups 1% milk

1 tsp. dried thyme

1 tsp. dried sage (or 1 Tbsp. fresh, chopped)

1 tsp. dried rosemary (or 1 Tbsp. fresh, chopped)

1 tsp. dried oregano (or 1 Tbsp. fresh, chopped)

1 tsp. dried chives (or 1 Tbsp. fresh, chopped)

1 cup carrots, diced

1/2 cup parsnips, diced

1/2 onion, diced

1 cup green peas, fresh or frozen

2 potatoes, diced

2 cups kale, cut into ribbons

1 1/3 sheets Pepperidge Farm puff pastry

1 egg

salt and pepper

Remove skin from chicken thighs and set aside.  Place chicken thighs in a large pot, add 1 tsp. salt, 3 garlic cloves, and the chicken skins, cover with water, and bring to a boil.  When the water is boiling, place a lid on the pot and turn the heat down to simmer.  Let cook for about 40 minutes.  When the time is up, drain the chicken and set aside to cool.  When chicken is cooled, discard the chicken skin and shred the chicken with your hands; discard of the bones.  Set shredded chicken aside.

Whisk together 1/2 cup water with 1/4 cup flour and set aside.  In a large pot, combine chicken broth and milk and bring to a boil.  When liquid is boiling, add the carrots, parsnips, onion, herbs, and 2 tsp. salt and 1 tsp. black pepper.  Place a lid on the pot, but leave a small vent between the lid and the pot; simmer for 20 minutes.  Next, add the diced potatoes and kale.  Cook for about 5 minutes, then add the chicken.  When the chicken is added, whisk in the water and flour mixture.

Preheat the over the 400 F.  Using kitchen scissors or a knife, cut the puff pastry sheets into 1/6 pieces.  roll each piece out to cover the lid of the oven-safe bowl or ramekins you’re using.  Ladle soup into each ramekin, then place the puff pastry pieces on top of them.  Whisk an egg into a small bowl and brush each puff pastry top with the egg wash.  Using a small knife, cut a 1-inch slit in the center of the puff pastry.  Place in the over for about 7-10 minutes, or until the puff pastry browns.  Plate each ramekin on a plate with a green salad and enjoy.

recipe remix: lightened up fettuccini alfredo

Image

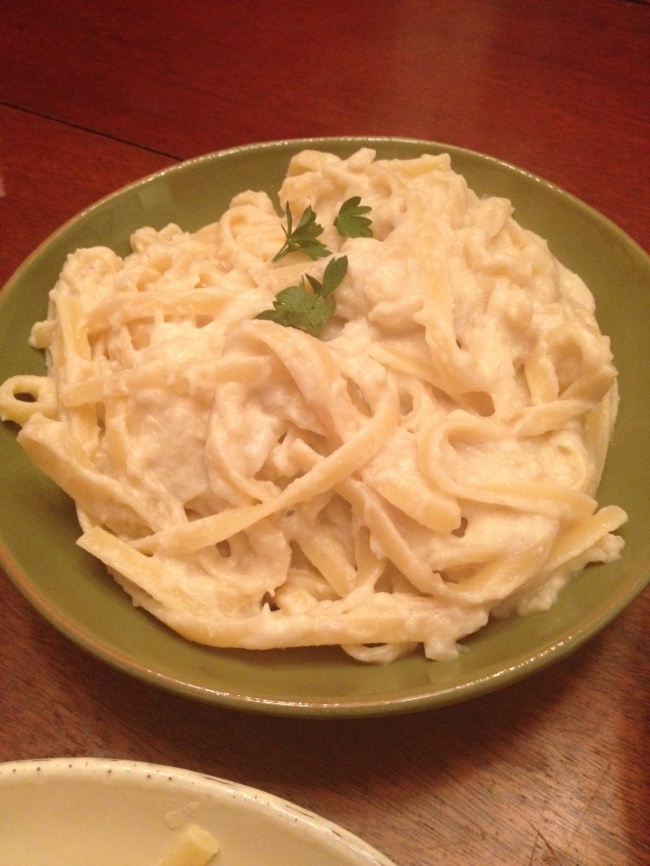
Welcome to Recipe Remix #1–Fettuccini Alfredo!  My college friend Claire Steinbeck made this special request.  Claire is a fellow teacher in search of healthy meals, and I have to give her a personal thank you for pushing me to try out this dish.  I hadn’t had fettuccini alfredo in years–partly because of watching what I eat, but also because I’m a little bit lactose intolerant (self-diagnosis, mind you), and I tend to steer clear of creamy pasta dishes because of the subsequent tummy ache.  Not only does this dish not give me tummy issues, but it also includes extra fiber from the secret ingredient: cauliflower.

Before I share the recipe with you, let me say that I tried three different sauces for this one: one with lowfat milk and flour, one with lowfat Greek yogurt and flour, and one with pureed cauliflower.  While I liked all three, the cauliflower version was Alex’s favorite, and I have to agree that it was the one that tasted the most like regular alfredo.  The lowfat milk version tasted too diet-y and left a little to be desired.  The Greek yogurt version was a close second, but it did have an ever-so-slight tang from the yogurt that Alex said reminded him of sour cream, which he doesn’t like.

“But wait, I don’t like cauliflower,” you say.

Think again.  This recipe couldn’t be easier, and the cauliflower couldn’t be less apparent.  You boil a chopped head of cauliflower for 25 minutes, saute some garlic and shallot, add some evaporated milk and chicken broth, then give it all a whirl in the food processor with some parmesan, nutmeg, salt, and pepper.  The cauliflower serves as the thickening agent and is flavorless, especially against the nutmeg, garlic, and shallot.  Even if you don’t think you like cauliflower, I challenge you to make this recipe.  I did some research and borrowed several ideas from several recipes, and I will definitely make this again.

Nutrition breakdown: 10 Weight Watchers points, which is roughly 500 calories per serving.  Compare that to 1200 calories for many restaurant versions, and you’ll be slurping up this pasta guilt-free.

If you’re gluten-free or low-carb, you could always use this sauce with zucchini noodles or spaghetti squash–that would be an especially healthy version.

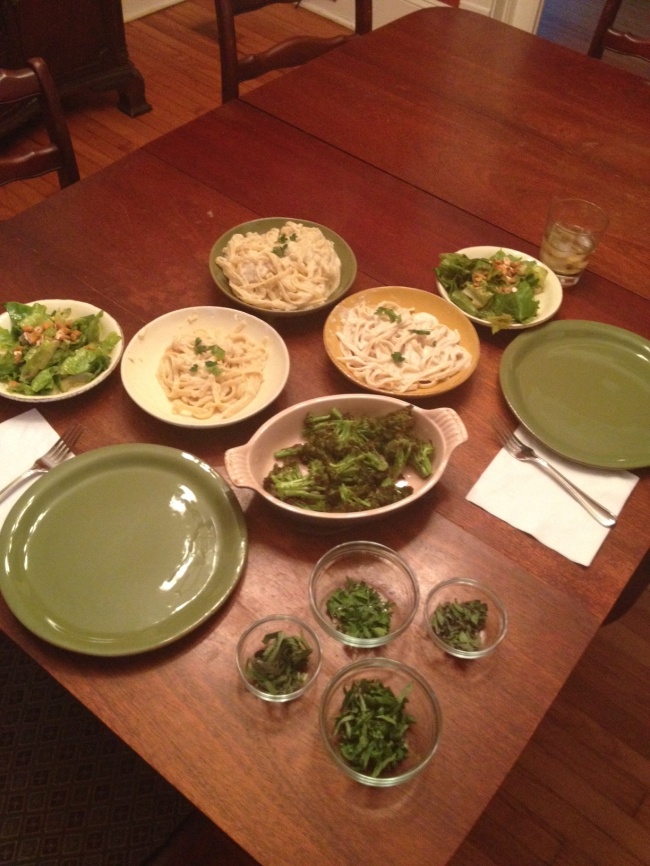
I served this dish with a small green salad and a side of roasted broccoli.

Lightened Up Fettuccini Alfredo

1 head cauliflower

1 Tbsp. olive oil

2 garlic cloves, minced

1 shallot, minced

1/2 cup fat free evaporated milk

1/2 cup fat free chicken broth

1 cup grated parmesan cheese

1 tsp. nutmeg

1/2 tsp. salt

1/4 tsp. white pepper

8 oz. fettuccini pasta

1 Tbsp. chopped fresh parsley

Bring a medium pot of water to a boil.  Give the cauliflower a rough chop, and when the water is boiling, add the cauliflower florets to the water, turn down the heat to simmer, and place the lid on the pot.  Cook for 25 minutes.

Cook pasta according the package directions.

When the cauliflower is cooked, drain it and set it aside.  In the same pot, add the olive oil and heat over medium heat.  Add the garlic and shallot and cook for about 2 minutes.  Next, add the evaporated milk and cook for about 1 minute.  Turn off the heat.  In a food processor or blender, combine the warm milk mixture with the chicken stock, parmesan, cauliflower, nutmeg, salt, and pepper.  Blend the ingredients until smooth.  Pour the sauce back into the pot and add the pasta.  Use tongs to combine the pasta with the sauce and top with fresh parsley.

Image